AWS で自己署名証明書(通称、オレオレ証明書)を使ってみようと思います。
自己署名証明書については、に全部書いてあります。
お急ぎの方は、以下3つだけやれば良い。これで10年間(3650日)有効なオレオレ証明書ができあがる。
$ openssl genrsa 2048 > server.key
$ openssl req -new -key server.key > server.csr
$ openssl x509 -days 3650 -req -signkey server.key < server.csr > server.crt
こうして見て分かった通り、サーバ証明書は、「サーバの公開鍵と、サーバのSubject(組織名・FQDNなど)と、有効期限」と、「それに付けられた認証曲(CA)の電子署名」のセットである。
本当に素晴らしい記事です。とても分かりやすいです。
AWS のノウハウについては、以下の本をベースにしました。
こちらも非常に分かりやすいです。オススメ。

Amazon Web Services クラウドデザインパターン実装ガイド 改訂版
- 作者: 大澤文孝,アマゾンデータサービスジャパン玉川憲,アマゾンデータサービスジャパン片山暁雄,アイレット鈴木宏康,日経SYSTEMS
- 出版社/メーカー: 日経BP社
- 発売日: 2015/03/05
- メディア: 単行本
- この商品を含むブログ (2件) を見る

Amazon Web Services クラウドデザインパターン 実装ガイド 改訂版 日経BP Next ICT選書
- 作者: アマゾンデータサービスジャパン玉川憲,片山暁雄,アイレット鈴木宏康
- 出版社/メーカー: 日経BP社
- 発売日: 2015/04/01
- メディア: Kindle版
- この商品を含むブログを見る
1. EC2インスタンスの Apache (mod_ssl) に自己署名証明書をインストールする場合
1) EC2インスタンス作成
まず、EC2インスタンスを起動します。
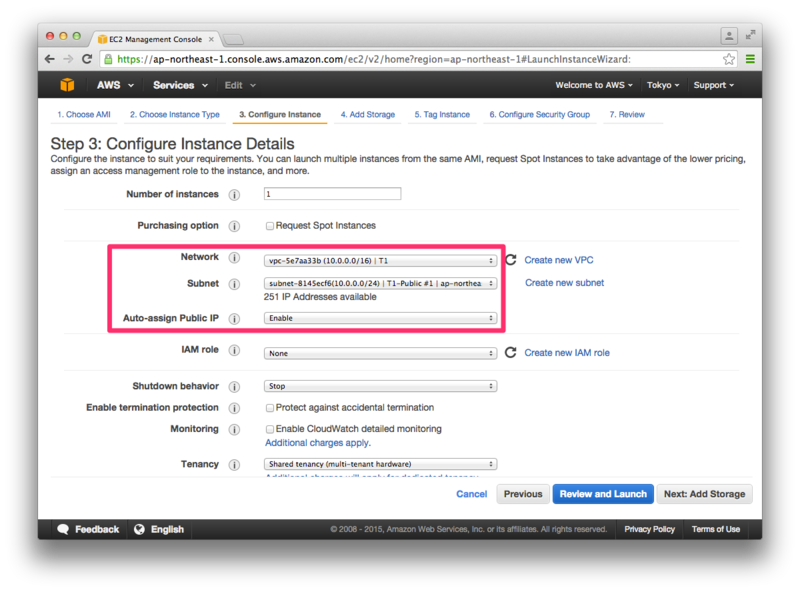
Region: Tokyo
VPC: T1 (10.0.0.0/16)
Subnet: T1-Public #1 (10.0.0.0/24)
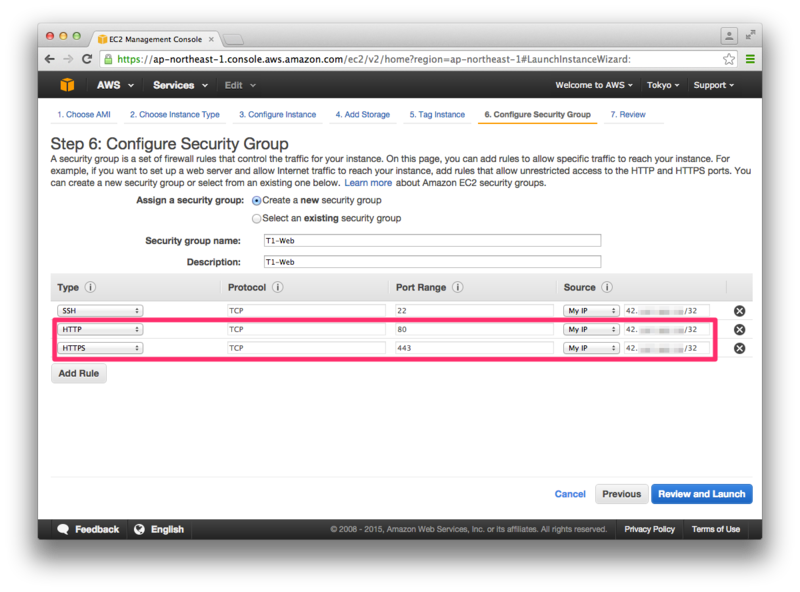
SG: T1-Web (22, 80, 443番を許可)
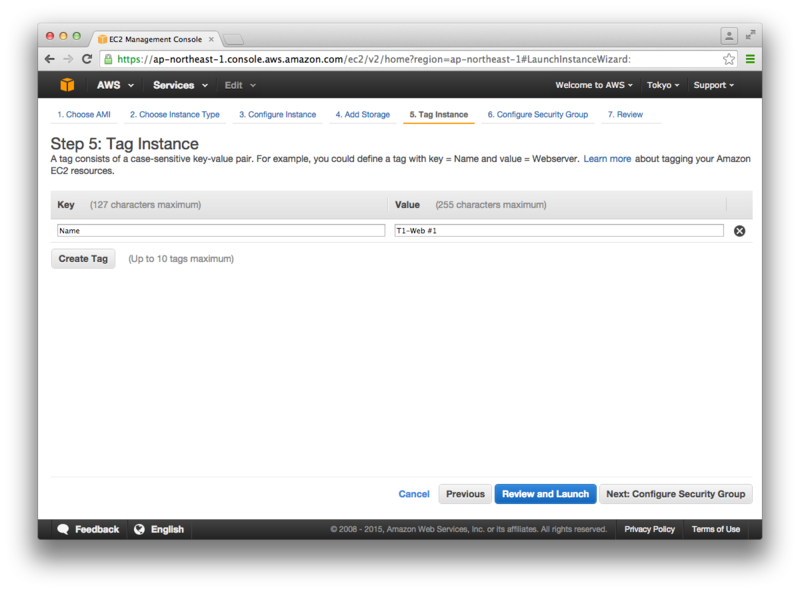
EC2: T1-Web #1 (Amazon Linux AMI)
Security Group 作成時に、443番ポートを許可しておきます(80番は任意)。
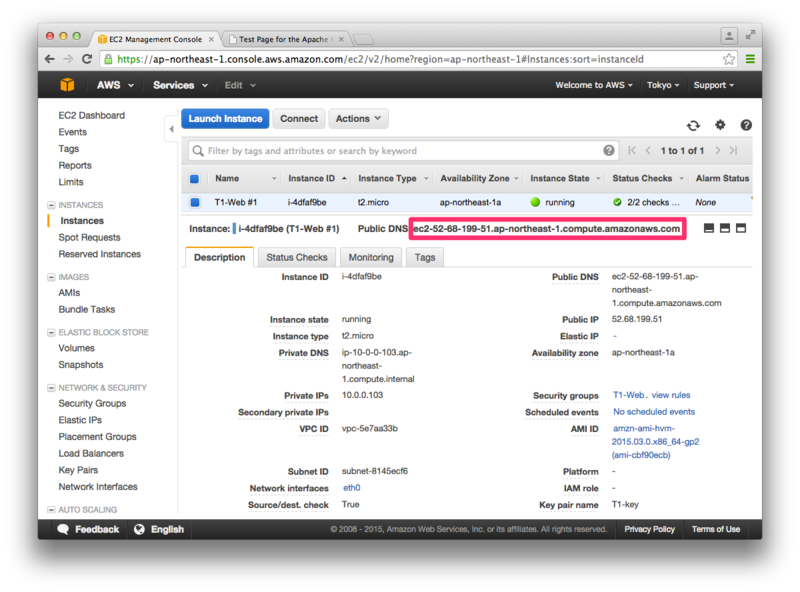
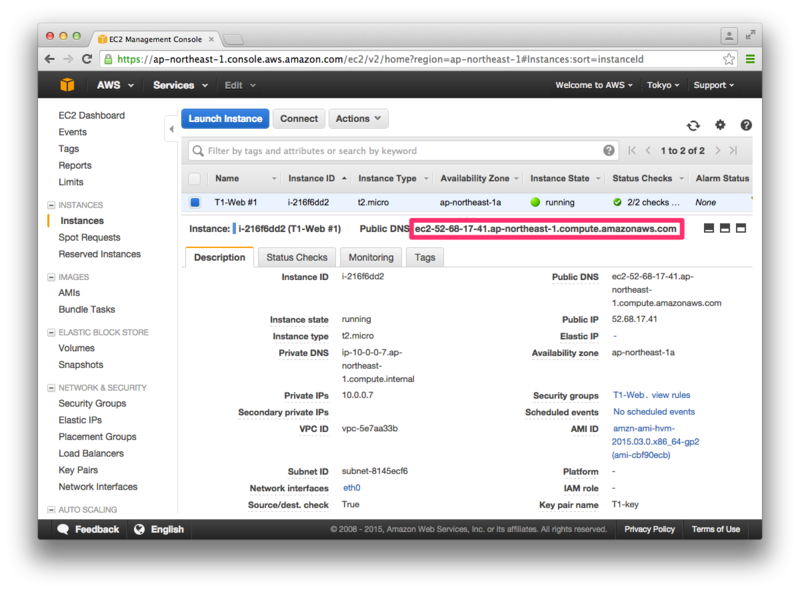
インスタンスが起動できたら、endpoint を確認します。
2) Apache, mod_ssl のインストール
EC2インスタンスに SSH で乗り込みます。(Mac の場合)
$ chmod 600 ~/Downloads/T1-key.pem
$ ssh -i ~/Downloads/T1-key.pem ec2-user@ec2-52-68-199-51.ap-northeast-1.compute.amazonaws.com
以降、root で操作します。
$ sudo -i
Apache, mod_ssl, openssl がインストールされているかを確認します。
Apache, mod_ssl がインストールされていないようなので、インストールします。
# rpm -qa | grep httpd
# rpm -qa | grep mod_ssl
# rpm -qa | grep openssl
openssl-1.0.1k-1.82.amzn1.x86_64

# yum -y install httpd
# yum -y install mod_ssl

# httpd -v
Server version: Apache/2.2.29 (Unix)
Server built:   Mar 12 2015 03:50:17
# openssl version
OpenSSL 1.0.1k-fips 8 Jan 2015
3) 秘密鍵、自己署名証明書の作成
秘密鍵、自己署名証明書を作成します。
# openssl genrsa 2048 > server.key

### 途中の入力は全てデフォルトで(Enterキー連打)
# openssl req -new -key server.key > server.csr
-----
Country Name (2 letter code) [XX]:
State or Province Name (full name) []:
Locality Name (eg, city) [Default City]:
Organization Name (eg, company) [Default Company Ltd]:
Organizational Unit Name (eg, section) []:
Common Name (eg, your name or your server's hostname) []:
Email Address []:

Please enter the following 'extra' attributes
to be sent with your certificate request
A challenge password []:
An optional company name []:

# openssl x509 -days 3650 -req -signkey server.key < server.csr > server.crt
Signature ok
subject=/C=XX/L=Default City/O=Default Company Ltd
Getting Private key
4) mod_ssl の設定
作成した秘密鍵と自己署名証明書を所定の位置(基本的にどこでもよいが、ある程度の流儀があるっぽい)に配置します。
# cd /etc/httpd/conf
# mkdir ssl.crt
# mkdir ssl.key -m 700
# mv /root/server.crt ssl.crt/
# mv /root/server.key ssl.key/
# chmod 400 ssl.key/server.key
ssl.conf を編集します。
なお、自己署名証明書を使う場合は、中間CA証明書に関する記述は不要となります。
vi /etc/httpd/conf.d/ssl.conf
(変更前)
<VirtualHost _default_:443>

# General setup for the virtual host, inherited from global configuration
#DocumentRoot "/var/www/html"
#ServerName www.example.com:443
  ・
  ・
#   Server Certificate:
# Point SSLCertificateFile at a PEM encoded certificate.  If
# the certificate is encrypted, then you will be prompted for a
# pass phrase.  Note that a kill -HUP will prompt again.  A new
# certificate can be generated using the genkey(1) command.
SSLCertificateFile /etc/pki/tls/certs/localhost.crt

#   Server Private Key:
#   If the key is not combined with the certificate, use this
#   directive to point at the key file.  Keep in mind that if
#   you've both a RSA and a DSA private key you can configure
#   both in parallel (to also allow the use of DSA ciphers, etc.)
SSLCertificateKeyFile /etc/pki/tls/private/localhost.key
  ・
  ・
</VirtualHost>
(変更後)
<VirtualHost _default_:443>

# General setup for the virtual host, inherited from global configuration
DocumentRoot "/var/www/html"
ServerName www.example.com:443
  ・
  ・
#   Server Certificate:
# Point SSLCertificateFile at a PEM encoded certificate.  If
# the certificate is encrypted, then you will be prompted for a
# pass phrase.  Note that a kill -HUP will prompt again.  A new
# certificate can be generated using the genkey(1) command.
SSLCertificateFile /etc/httpd/conf/ssl.crt/server.crt

#   Server Private Key:
#   If the key is not combined with the certificate, use this
#   directive to point at the key file.  Keep in mind that if
#   you've both a RSA and a DSA private key you can configure
#   both in parallel (to also allow the use of DSA ciphers, etc.)
SSLCertificateKeyFile /etc/httpd/conf/ssl.key/server.key
  ・
  ・
</VirtualHost>
5) Apache の起動
httpd を起動します。もし起動済みなら、reload で再起動します。
# service httpd configtest
Syntax OK
# service httpd start
Starting httpd:                                            [  OK  ]
これで設定は完了です。
EC2インスタンスのホスト名を使って、
https://ec2-52-68-199-51.ap-northeast-1.compute.amazonaws.com/
にアクセスしてみます。
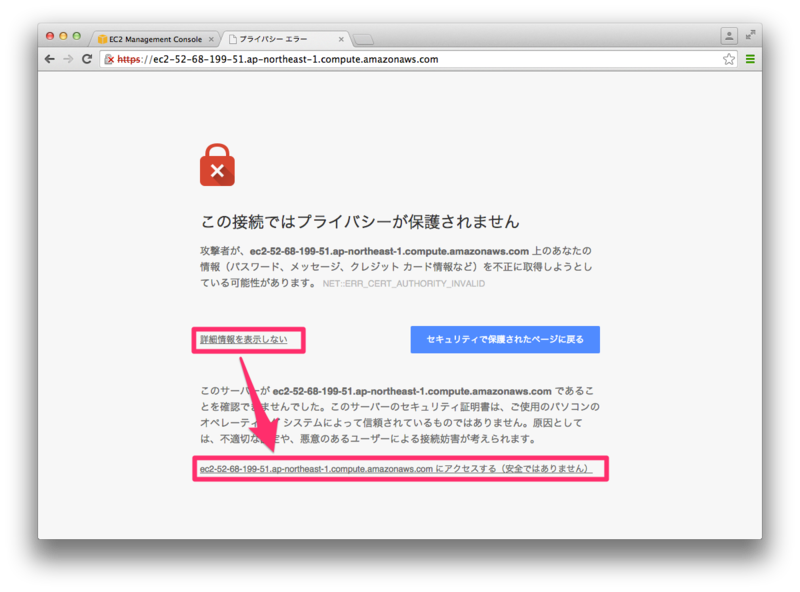
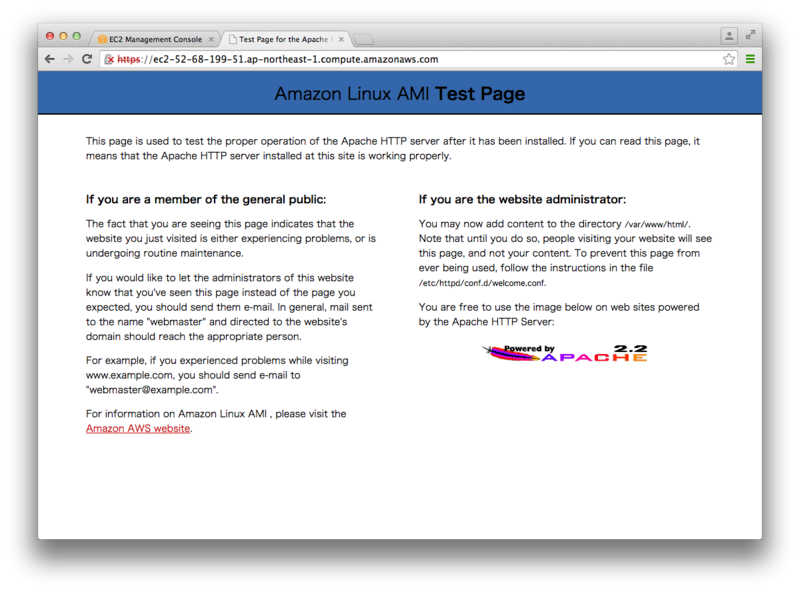
確認できました。
ここで、index.html を配置してみます。
# cat <<EOF > /var/www/html/index.html
<!DOCTYPE html>
<html lang="ja">
<head>
<meta charset="UTF-8">
<title>Test</title>
</head>
<body>
test
</body>
</html>
EOF
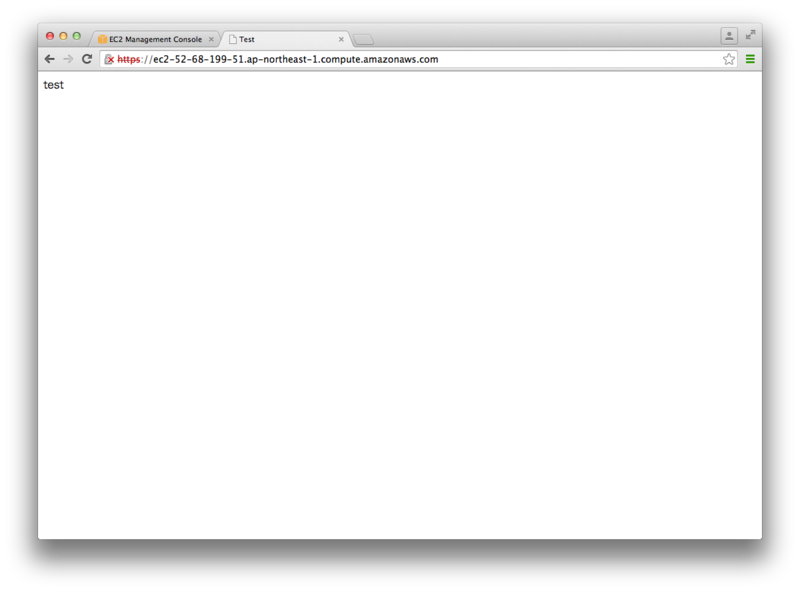
index.html が表示されるようになりました。
2. ELB に自己署名証明書をインストールする場合
今度は、EC2インスタンスではなく、ELB に SSL証明書をインストールしてみます。
HTTPS通信は ELB で HTTP に変換されるようにするため、EC2側では SSL は処理しません。
公式ドキュメントのが非常に参考になります。
なお、ELBで SSL証明書を使う場合には、秘密鍵にパスフレーズを付けてはいけません。秘密鍵からパスフレーズを除去する方法もありますので、適宜ググりましょう。
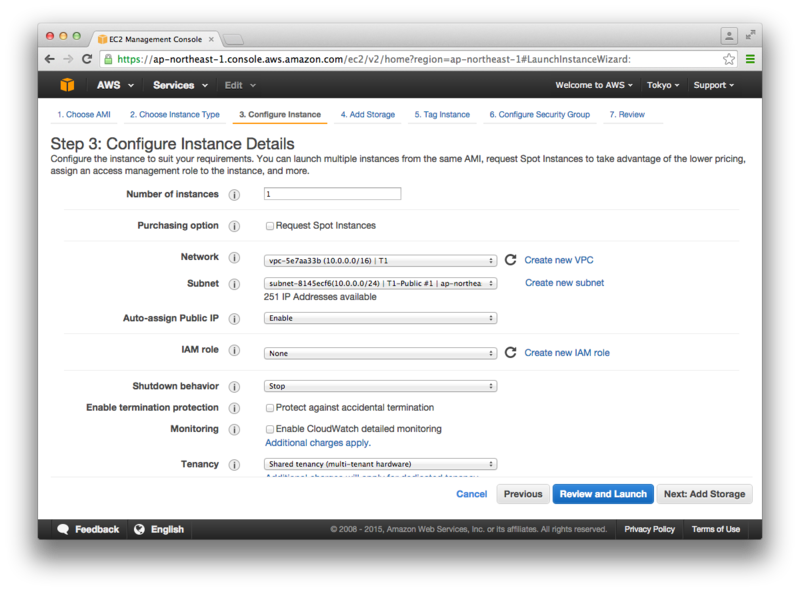
1) EC2インスタンス作成
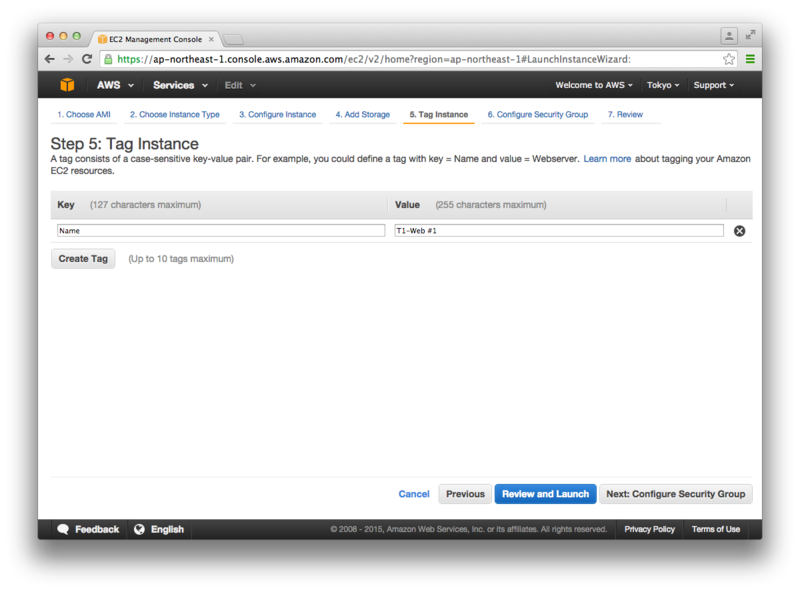
EC2インスタンスを起動します。
Region: Tokyo
VPC: T1 (10.0.0.0/16)
Subnet: T1-Public #1 (10.0.0.0/24)
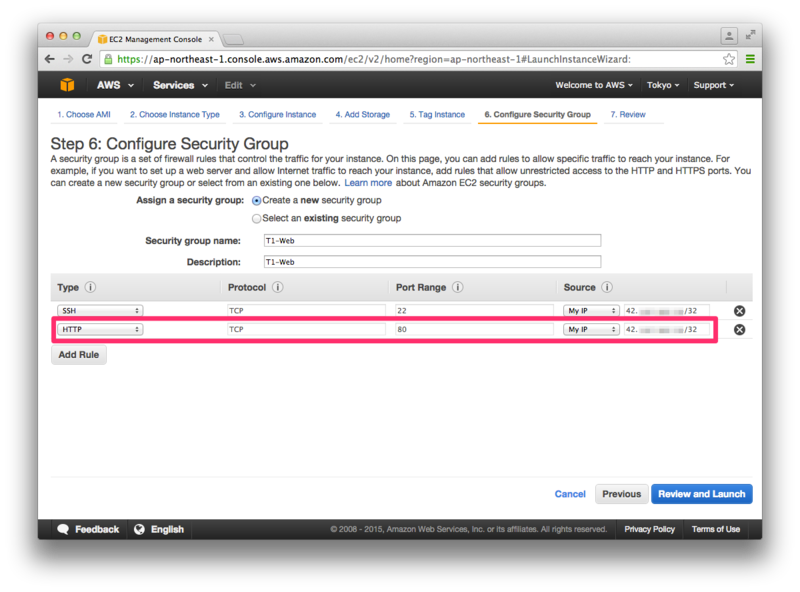
SG: T1-Web (22, 80番を許可)
EC2: T1-Web #1 (Amazon Linux AMI)
Security Group の許容ポートに「443」を入れないこと以外は、1. の場合と同じです。
2) Apache のインストール
EC2側では SSL は処理しないので、mod_ssl はインストールしません。
$ chmod 600 ~/Downloads/T1-key.pem
$ ssh -i ~/Downloads/T1-key.pem ec2-user@ec2-52-68-17-41.ap-northeast-1.compute.amazonaws.com
以降は、root で操作します。
$ sudo -i
# rpm -qa | grep httpd
# rpm -qa | grep openssl
openssl-1.0.1k-1.82.amzn1.x86_64

# yum -y install httpd

# httpd -v
Server version: Apache/2.2.29 (Unix)
Server built:   Mar 12 2015 03:50:17
# openssl version
OpenSSL 1.0.1k-fips 8 Jan 2015
3) 秘密鍵、自己署名証明書の作成
# openssl genrsa 2048 > server.key
# openssl req -new -key server.key > server.csr
# openssl x509 -days 3650 -req -signkey server.key < server.csr > server.crt
4) Apache の起動
# service httpd start
Starting httpd:                                            [  OK  ]
ここで、index.html も作成しておきます。
# cat <<EOF > /var/www/html/index.html
<!DOCTYPE html>
<html lang="ja">
<head>
<meta charset="UTF-8">
<title>Test</title>
</head>
<body>
test
</body>
</html>
EOF
5) ELB作成
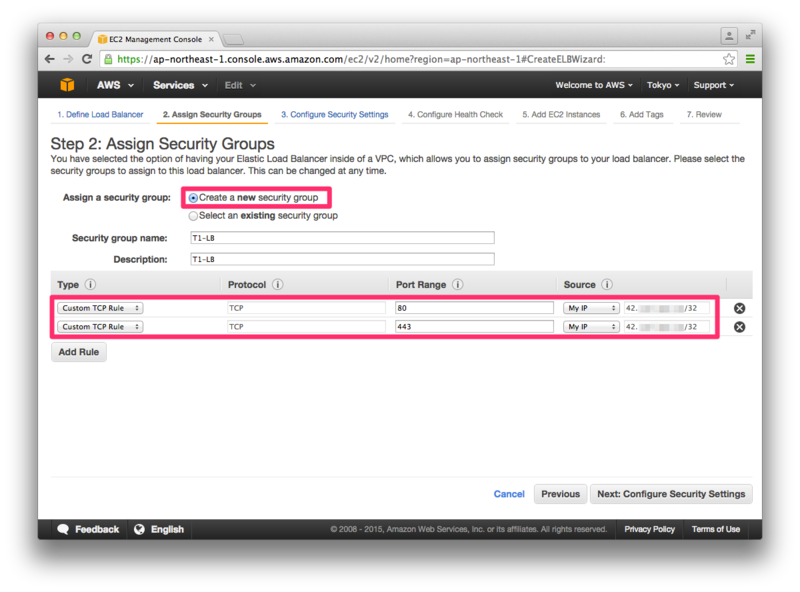
SG: T1-LB (80, 443番を許可)
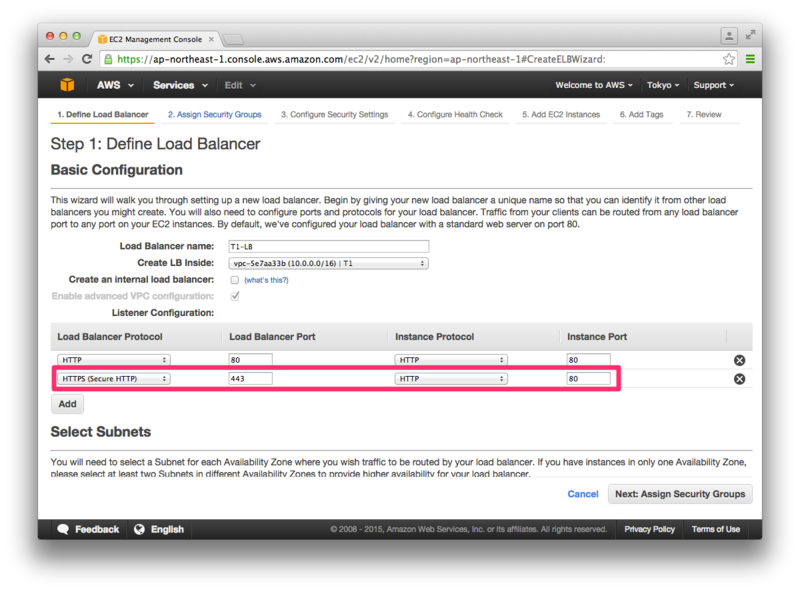
ELB: T1-LB (HTTPS(443) を許可)
HTTPS(443) を HTTP(80) に変換してEC2インスタンス側に転送するように設定します。

Security Group 作成時に、443番ポートを許可しておきます(80番は任意)。
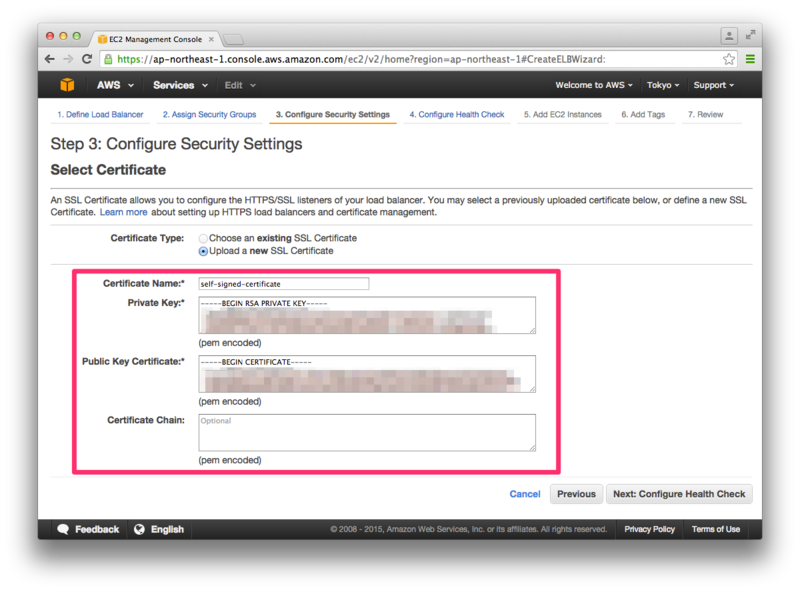
[Step 3: Configure Security Settings] で、SSL証明書の情報を設定します。
| Certificate Name | 任意の名前(例「self-signed-certificate」)を指定します。 |
| Private Key | 下記 ① |
| Public Key Certificate | 下記 ② |
| Certificate Chain | 中間CA証明書は、自己署名証明書では貼り付け不要。 |
① 秘密鍵の中身を貼り付け
# openssl rsa -text < /root/server.key
で中身を表示させて、
-----BEGIN RSA PRIVATE KEY-----
から
-----END RSA PRIVATE KEY-----
までを貼り付け。
② 自己署名証明書の中身を貼り付け
# openssl x509 -text < /root/server.crt
で中身を表示させて、
-----BEGIN CERTIFICATE-----
から
-----END CERTIFICATE-----
までを貼り付け。
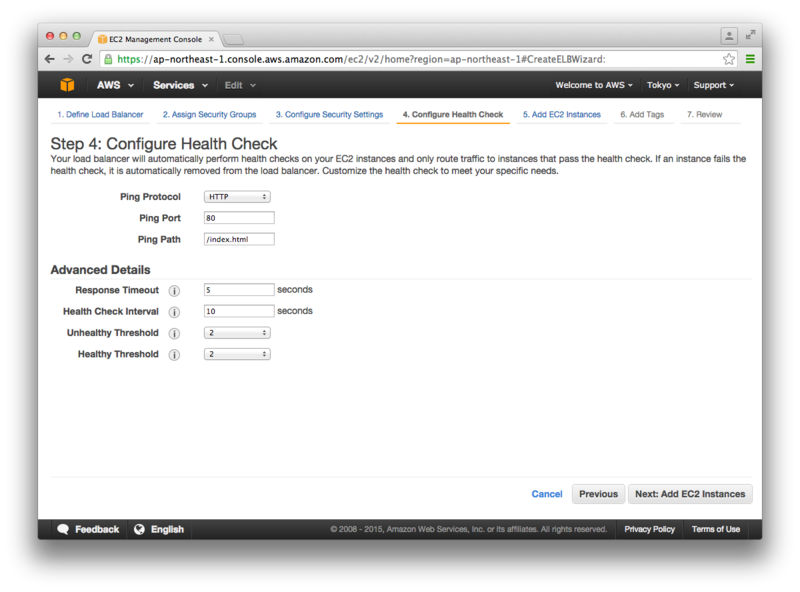
ヘルスチェックは、適当に値を調整。
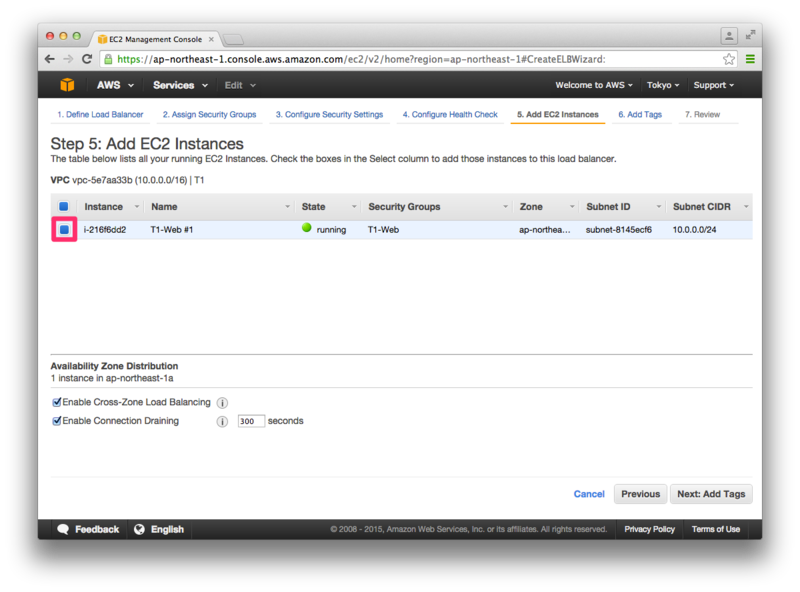
作成した EC2インスタンスを選択します。
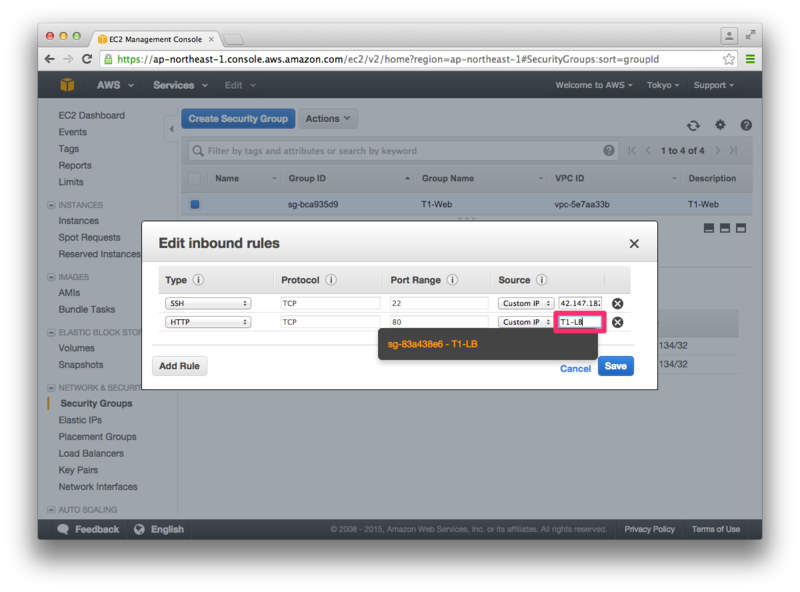
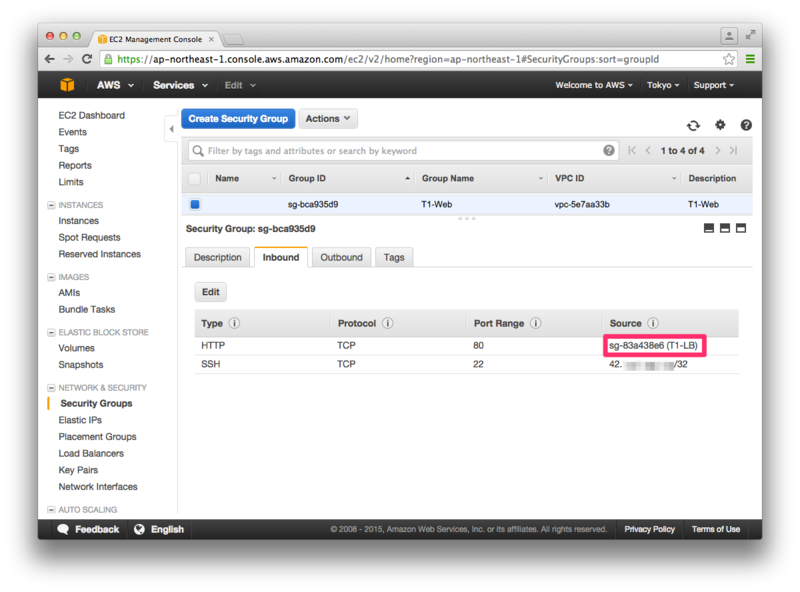
EC2インスタンス側の Security Group を、ELB からのリクエストに限定するように変更します。具体的には、Source に、ELB の Security Group を選択します。
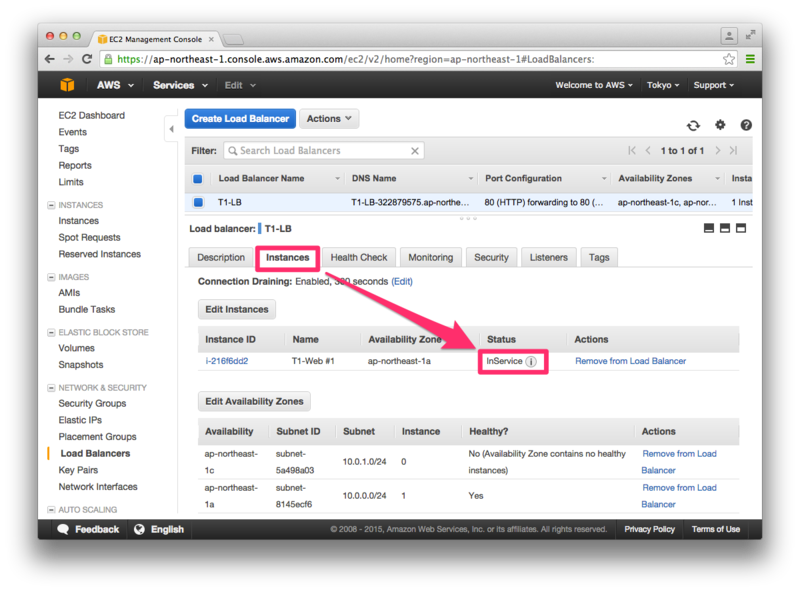
EC2インスタンスのヘルスチェックが「InService」になっていることを確認。
ELBのホスト名でアクセスします。
https://T1-LB-322879575.ap-northeast-1.elb.amazonaws.com/
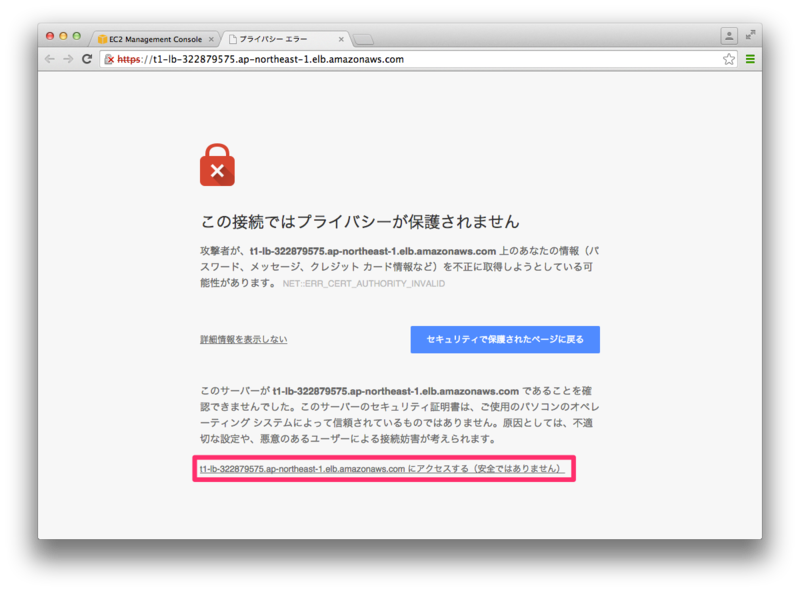
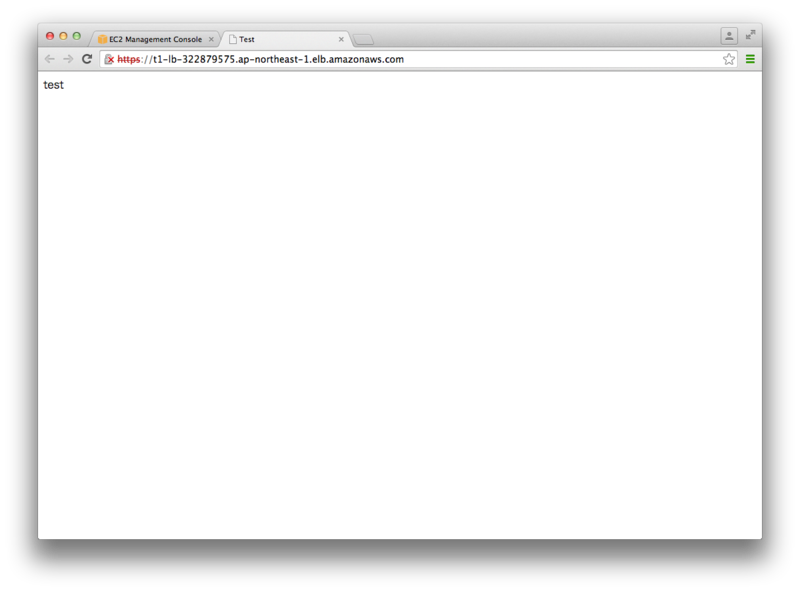
index.html が表示されました。