「Xを飛ばす」というのは、Windowsでいうところの「リモートデスクトップ接続」のように、Linuxのデスクトップ環境を別マシンから操作することを指します。
いくつかやり方があるようですが、今回は、Linuxサーバ側に「vnc4server」を起動させて、WindowsからはVNCビューア経由で X window を取得する方法を試してみます。
やりたいこと
環境(サーバ側)
- Ubuntu Server 12.04 LTS(Amazon EC2)
- vnc4server
1. Ubuntu Server 12.04 LTS インスタンスを起動
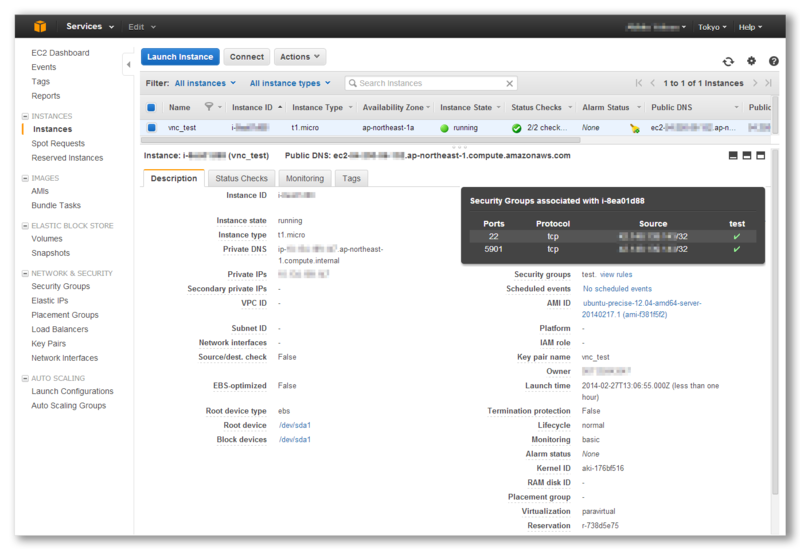
Amazon Web Service から、EC2インスタンスを立ち上げます。
| リージョン | Tokyo(任意) |
| AMI | Ubuntu Server 12.04 LTS (PV) - ami-f381f5f2 (64-bit) |
| Instance type | t1.micro(何でもよいですが、テストなので小さめ) |
| Availability zone | ap-northeast-1a |
| Security groups | SSH用に「22」、VNC用に「5901」を開けます(クライアント側のIPを指定) |
2. PuTTY から EC2インスタンスにログイン(クライアント側)
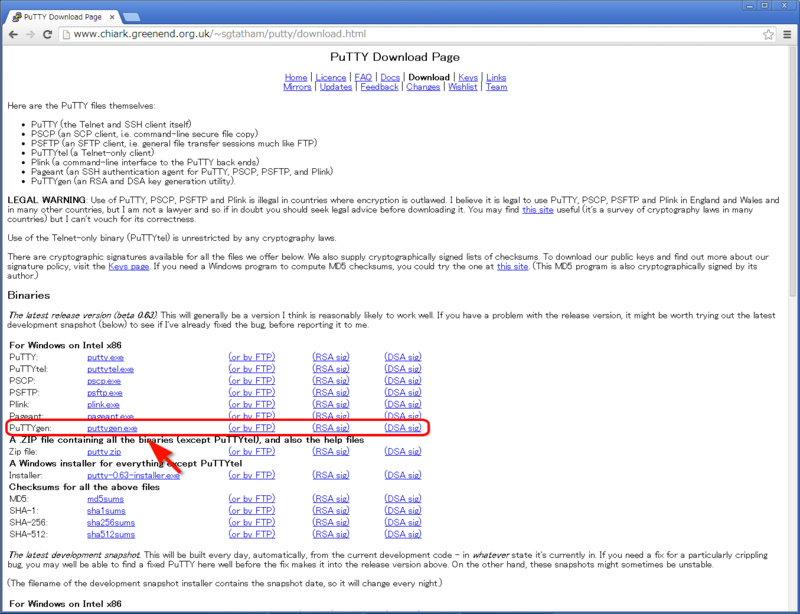
http://www.chiark.greenend.org.uk/~sgtatham/putty/download.html
から、「PuTTYgen (puttygen.exe)」をダウンロードします。
「PuTTYgen (puttygen.exe)」を起動し、「Load」ボタンをクリックして EC2インスタンスに割り付けた Key pair(pemファイル) を読み込んだ後、
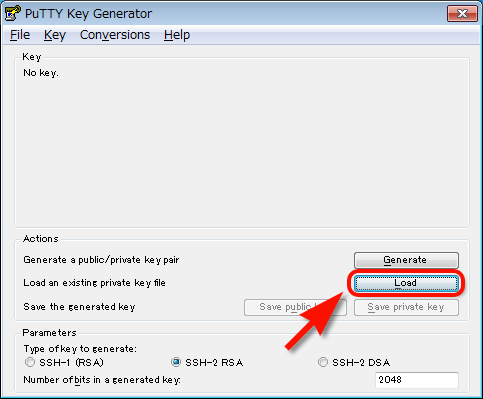
「Save private key」をクリックして、PuTTY用の鍵に変換します(拡張子は「.ppk」などとして保存します)。

同じく、
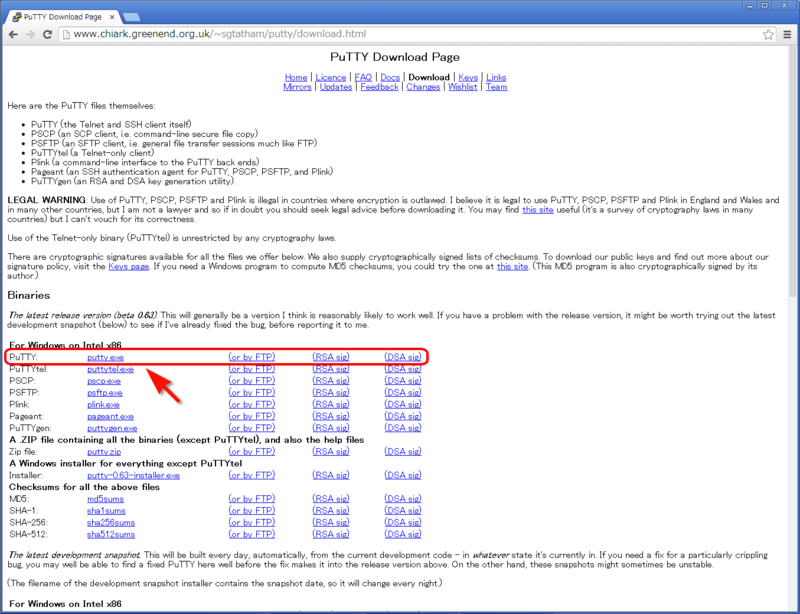
http://www.chiark.greenend.org.uk/~sgtatham/putty/download.html
から、「For Windows on Intel x86」の「PuTTY (putty.exe)」をダウンロードします。
「PuTTY (putty.exe)」を起動し、[Connection] -> [SSH] -> [Auth] の「Private key file for authentication」から、変換した「.ppk」ファイルを選択します。

あとは、EC2の「Public IP」アドレスを指定して、SSH接続します。

3. vncserverを起動(サーバ側)
$ sudo apt-get update
$ sudo apt-get -y install ubuntu-desktop
(※完了まで 15分ほどかかります。なお、インストール後は reboot させなくても大丈夫です)

$ sudo apt-get -y install vnc4server

# ディスプレイ番号を「:1」と指定するとポート5901で起動(デフォルトが 5900+ディスプレイ番号)
$ vncserver :1

You will require a password to access your desktops.

Password: (パスワードを入力)
Verify: (同上)
xauth:  file /home/ubuntu/.Xauthority does not exist

New 'ip-xx-xx-xx-xx:1 (ubuntu)' desktop is ip-xx-xx-xx-xx:1

Creating default startup script /home/ubuntu/.vnc/xstartup
Starting applications specified in /home/ubuntu/.vnc/xstartup
Log file is /home/ubuntu/.vnc/ip-xx-xx-xx-xx:1.log
/home/ubuntu/.vnc/xstartup、その他諸々のファイルが作成されます。
ここで、VNC接続時のパスワードを決定して入力するのですが、長すぎる(8文字を超える)場合は「先頭8文字を使う」とのことです。
次に、
# vncserver を一旦停止
$ vncserver -kill :1

vim ~/.vnc/xstartup
-----
exec gnome-session &
vncconfig -nowin &
-----
(※↑を最終行に追加)

# ディスプレイ番号「1」、解像度「1440x800 」、色深度「24」で起動
$ vncserver :1 -geometry 1440x800 -depth 24
参考
http://sdc.sangi.jp/2012/10/amazonec2guiubuntu.html
ちなみに、vncserver の起動ポート番号を固定する方法もあります。
# まずは使用中のポートを確認
$ netstat -untap

$ sudo vim /usr/bin/vncserver
-----
$vncPort = 5900 + $displayNumber;
  ↓
$vncPort = 5999;
-----
参考
評判のさくらのVPSを使ってVNCを使ってリモートデスクトップの環境を設定してみる
4. VNCで接続(クライアント側)
RealVNC をインストールします。
https://www.realvnc.com/
から、「Download」をクリックします。*1

https://www.realvnc.com/download/
から、「VNC Viewer」の Windows のアイコンをクリック。
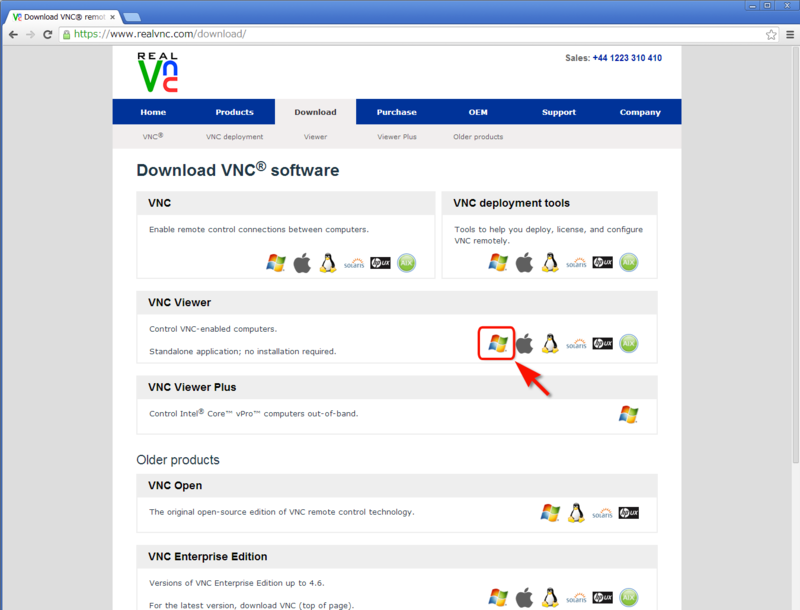
「VNC Viewer for Windows (exe) 64-bit」を選択します。
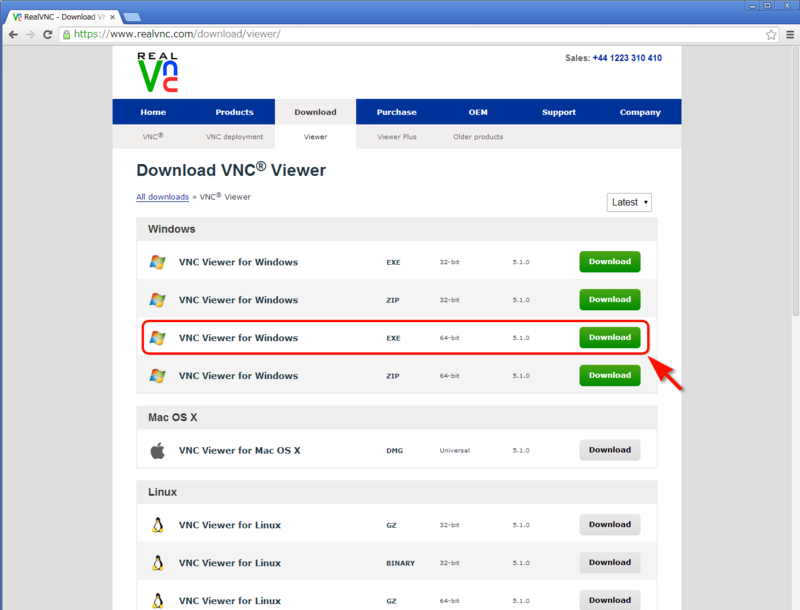


「VNC-Viewer-5.1.0-Windows-64bit.exe」を起動します。
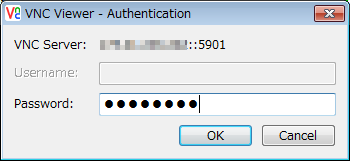
| VNC Server | <EC2インスタンス の Public IP>:5901 |
| Encryption | 任意 |
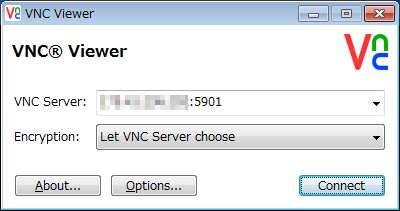
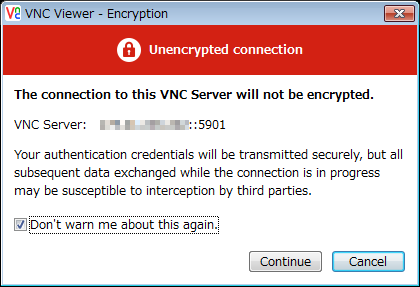
パスワードは、vncserver起動時に設定したものを指定します。
デスクトップ環境が操作できるようになりました。

なお、
VNCクライアントから直接ログインする設定
このままだと、VNCで画面を表示するまでに一度、ubuntuにターミナルなどでログインしてから、VNCサーバを起動したあとVNCクライアントでubuntuにアクセスしなければなりません。VNCクライアントで直接ログインするためには、xinetdを使用する必要があります。また、使用するポートの設定を行うため、「/etc/services」ファイルの設定も行います。
http://www.uetyi.mydns.jp/wordpress/colinux-setting/entry-279.html
というのがあるそうですが、なるほどUbuntuを再起動すると、一旦sshで接続して、
vncserver :1 -geometry 1440x800 -depth 24
を叩いておかないと、VNCから接続できなくなります。
毎回めんどいけど、まあ今のところはいいかな。
参考
http://ur.edu-connect.net/archives/543
注意
Xmint+PuTTYを使うやり方もあったのですが、表示されたデスクトップ環境が不安定だったので、結局ヤメにしました。
参考
http://d.hatena.ne.jp/horus531/20110227/1298791923
で、何が楽しいのか?
Firefox がプログラムから操作できます。
つまり、Amazon EC2 で、Selenium のテストができるのが最大の利点です。*2
$ sudo apt-get -y install python-pip
$ sudo pip install splinter
Downloading/unpacking splinter
  Downloading splinter-0.6.0.tar.gz
  Running setup.py egg_info for package splinter

    no previously-included directories found matching 'tests'
Downloading/unpacking selenium>=2.39.0 (from splinter)
  Downloading selenium-2.40.0.tar.gz (2.5Mb): 2.5Mb downloaded
  Running setup.py egg_info for package selenium

Installing collected packages: splinter, selenium
  Running setup.py install for splinter

    no previously-included directories found matching 'tests'
  Running setup.py install for selenium

Successfully installed splinter selenium
Cleaning up...
Splinterは内部でSeleniumを使っているので、Seleniumも同時にインストールされるようです。(The remote driver uses Selenium Remote to control a web browser on a remote machine.)
test_splint.py
#! /usr/bin/env python
# -*- coding: utf-8 -*-

from splinter import Browser

with Browser() as browser:
    # Visit URL
    url = "http://www.google.com"
    browser.visit(url)
    browser.fill('q', 'splinter - python acceptance testing for web applications')
    # Find and click the 'search' button
    button = browser.find_by_name('btnG')
    # Interact with elements
    button.click()
    if browser.is_text_present('splinter.cobrateam.info'):
        print "Yes, the official website was found!"
    else:
        print "No, it wasn't found... We need to improve our SEO techniques"
GUI(デスクトップ)環境を使わず、SSHクライアント上で実行すると、
$ chmod +x test_splint.py

$ ./test_splint.py
Traceback (most recent call last):
  File "./test_splint.py", line 6, in <module>
    with Browser() as browser:
  File "/usr/local/lib/python2.7/dist-packages/splinter/browser.py", line 53, in Browser
    return driver(*args, **kwargs)
  File "/usr/local/lib/python2.7/dist-packages/splinter/driver/webdriver/firefox.py", line 33, in __init__
    self.driver = Firefox(firefox_profile)
  File "/usr/local/lib/python2.7/dist-packages/selenium/webdriver/firefox/webdriver.py", line 59, in __init__
    self.binary, timeout),
  File "/usr/local/lib/python2.7/dist-packages/selenium/webdriver/firefox/extension_connection.py", line 47, in __init__
    self.binary.launch_browser(self.profile)
  File "/usr/local/lib/python2.7/dist-packages/selenium/webdriver/firefox/firefox_binary.py", line 61, in launch_browser
    self._wait_until_connectable()
  File "/usr/local/lib/python2.7/dist-packages/selenium/webdriver/firefox/firefox_binary.py", line 100, in _wait_until_connectable
    self._get_firefox_output())
selenium.common.exceptions.WebDriverException: Message: 'The browser appears to have exited before we could connect. The output was: Error: no display specified\n'
とエラーになるのですが、VNC上から実行すると Firefoxが立ちあがってテストが始まります。
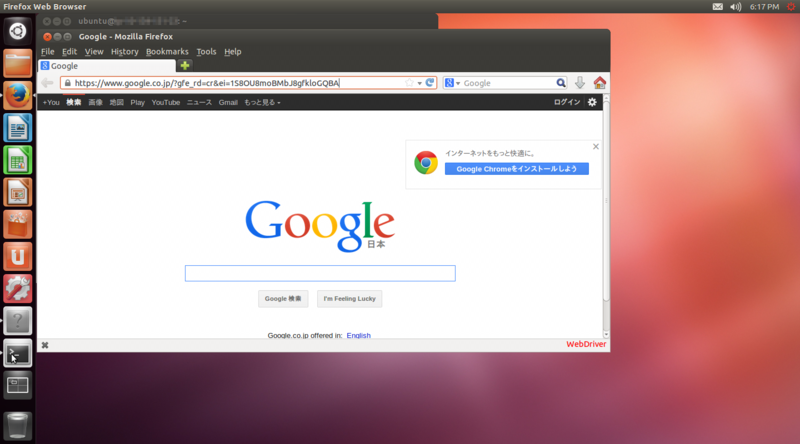
また、素の Selenium だとこうなります。
test_selenium.py
#! /usr/bin/env python
# -*- coding: utf-8 -*-

from selenium import webdriver
driver = webdriver.Firefox()
driver.get(u"http://www.google.co.jp")
$ chmod +x test_selenium.py
$ ./test_selenium.py
参考
http://docs.seleniumhq.org/docs/04_webdriver_advanced.jsp
参考
http://webtech-walker.com/archive/2013/04/xvfb-js-unit-test.html
http://d.hatena.ne.jp/tushuhei/20131009/1381302187
