はじめに
re:Invent 2015 で発表された「Python for Lambda」(Python Functions) により、Pythonコードが Lambda 上で実行できるようになりました。
そうなると、例えば、とある S3バケットに mp4形式のファイルがアップロードされたら、Lambda Function がそれを検知して、出力用のバケットに HLS形式の動画を作成して自動的に配置するといった仕組みを作ることができるようになります(これまでも、Node.js や Java でやろうと思えばできたわけですが。。)。
いやぁ、夢が広がりますね。
しかしながら、Python Functions では、AWS のリソースを操作するためには、(デフォルトのままでは)Boto ではなく Boto3 を使わないといけません。
というわけで今回は、Boto3 を少し試してみることにしました。先に結論を書いてしまうと、そんなに違和感はなかったです。
今回は、以下の過去記事
でやったこと、すなわち、
- Elastic Transcoder用の IAM Role を用意する
- S3 バケット(入力バケット・出力バケット)を用意する
- S3 の Bucket Policy を設定する
- 入力バケットに変換元となる動画ファイルをアップロード
- Pipeline を作成
- Job を作成
- Static Website Hosting を設定する
- ブラウザ(Safari)で動作確認
の「Pipeline を作成」「Job を作成」の部分を、Boto3 を使ってやってみることにします。
<参考>
1. Elastic Transcoder用の IAM Role を用意する
IAM Role は、前回 作成した「Elastic_Transcoder_Default_Role」を使用します。
ちなみに、「Elastic_Transcoder_Default_Role」の Inline Policies は以下のようになっています。
{
  "Version": "2008-10-17",
  "Statement": [
    {
      "Sid": "1",
      "Effect": "Allow",
      "Action": [
        "s3:Put*",
        "s3:ListBucket",
        "s3:*MultipartUpload*",
        "s3:Get*"
      ],
      "Resource": "*"
    },
    {
      "Sid": "2",
      "Effect": "Allow",
      "Action": "sns:Publish",
      "Resource": "*"
    },
    {
      "Sid": "3",
      "Effect": "Deny",
      "Action": [
        "s3:*Delete*",
        "s3:*Policy*",
        "sns:*Remove*",
        "sns:*Delete*",
        "sns:*Permission*"
      ],
      "Resource": "*"
    }
  ]
}
2. S3 バケット(入力バケット・出力バケット)を用意する
入力バケット・出力バケットそれぞれのバケット名は、それぞれ
| 入力バケット | boto3-transcoder-in |
| 出力バケット | boto3-transcoder-out |
としました。
最終的なツリー構造は、このようになります。
【入力バケット】
boto3-transcoder-in/
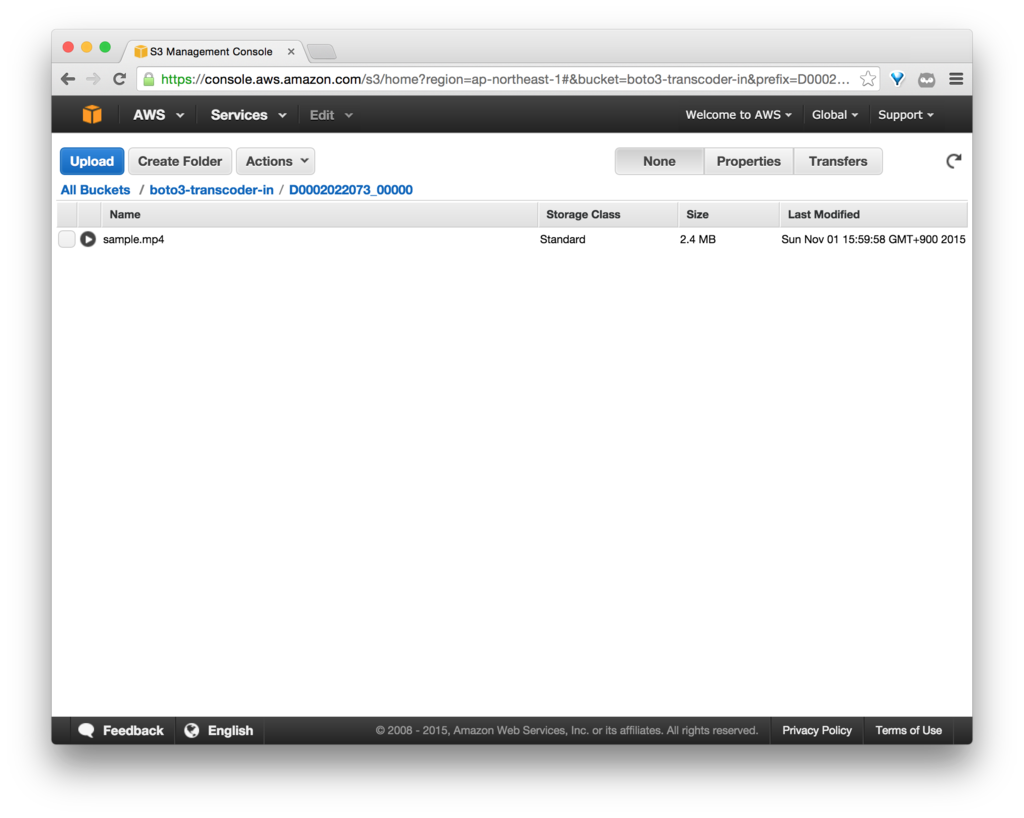
 └─D0002022073_00000/
   └─sample.mp4
なお、前回 と比較して、バケット直下の「MP4」ディレクトリは作らないことにしました(拡張子で判断できるので)。
【出力バケット】
boto3-transcoder-out/
 └─HLS/
   └─1M/
     └─D0002022073_00000/
       ├─sample.m3u8
       ├─sample00000.ts
       ├─sample00001.ts
       ├─sample00002.ts
       └─sample00003.ts
3. S3 の Bucket Policy を設定する
入力バケット (boto3-transcoder-in) の Bucket Policy は、
- Elastic_Transcoder_Default_Role からの GetObject を許可
するために、以下のように設定しました。
{
    "Version": "2012-10-17",
    "Statement": [
        {
            "Sid": "1",
            "Action": [
                "s3:GetObject"
            ],
            "Effect": "Allow",
            "Resource": "arn:aws:s3:::boto3-transcoder-in/*",
            "Principal": {
                "AWS": [
                    "arn:aws:iam::{AWS Account ID}:role/Elastic_Transcoder_Default_Role"
                ]
            }
        }
    ]
}
出力バケット (boto3-transcoder-out) の Bucket Policy は、
- Elastic_Transcoder_Default_Role からの PutObject を許可(Elastic Transcoder からファイルを追加するため)
- 全てのユーザからの GetObject を許可(ブラウザからアクセスするため)
を実現するために、以下のように設定しました。
{
  "Version": "2012-10-17",
  "Statement": [
    {
      "Sid": "1",
      "Action": [
        "s3:PutObject"
      ],
      "Effect": "Allow",
      "Resource": "arn:aws:s3:::boto3-transcoder-out/*",
      "Principal": {
        "AWS": [
          "arn:aws:iam::{AWS Account ID}:role/Elastic_Transcoder_Default_Role"
        ]
      }
    },
    {
      "Sid": "2",
      "Action": [
        "s3:GetObject"
      ],
      "Effect": "Allow",
      "Resource": "arn:aws:s3:::boto3-transcoder-out/*",
      "Principal": "*"
    }
  ]
}
4. 入力バケットに変換元となる動画ファイルをアップロード
変換する元ファイル(mp4)は、NHKクリエイティブ・ライブラリーから以下の素材を使用しました。
http://www1.nhk.or.jp/creative/material/18/D0002022073_00000.html
入力バケットの以下のディレクトリにアップロードします。

5. Pipeline & Job を作成
ここからが本番です。
Pipeline の作成、および Job の作成を、Boto3 を使って実行します。
本家のサンプルコード、github.com
を参考にしました。
使用した Boto3 のAPIは、こんな感じです。
import boto3

transcoder = boto3.client('elastictranscoder', 'ap-northeast-1')

# Create a pipeline
transcoder.create_pipeline(**kwargs)

# Create a job
transcoder.create_job(**kwargs)
<参考>
- http://boto3.readthedocs.org/en/latest/reference/services/elastictranscoder.html#ElasticTranscoder.Client.create_pipeline
- http://boto3.readthedocs.org/en/latest/reference/services/elastictranscoder.html#ElasticTranscoder.Client.create_job
まずは、Boto3 のインストールをします。
pip でインストールします。
$ pip install boto3
$ pip list | grep boto3
boto3 (1.2.1)
ソースコードは以下の通りです。
elastic_transcoder.py
#!/usr/bin/python

from datetime import datetime
import logging

import boto3
from botocore.client import ClientError

REGION_NAME = 'ap-northeast-1'
TRANSCODER_ROLE_NAME = 'Elastic_Transcoder_Default_Role'
PIPELINE_NAME = 'HLS Transcoder'
IN_BUCKET_NAME = 'boto3-transcoder-in'
OUT_BUCKET_NAME = 'boto3-transcoder-out'
INPUT_KEY = 'D0002022073_00000/sample.mp4'  # e.g. 'D0002021500_00000/sample.mp4'

logging.basicConfig()  # http://stackoverflow.com/questions/27411778/no-handlers-found-for-logger-main
logger = logging.getLogger(__name__)


def main():
    transcoder = boto3.client('elastictranscoder', REGION_NAME)
    s3 = boto3.resource('s3')
    iam = boto3.resource('iam')

    def check_role(role_name):
        try:
            # If the IAM role doesn't exist, raises ClientError
            iam.meta.client.get_role(RoleName=role_name)
        except ClientError:
            raise

    # Check if role exists
    check_role(TRANSCODER_ROLE_NAME)
    role = iam.Role(TRANSCODER_ROLE_NAME)

    def check_bucket(bucket_name):
        try:
            # If the bucket doesn't exist, raises ClientError
            s3.meta.client.head_bucket(Bucket=bucket_name)
        except ClientError:
            logger.error("No such bucket exists. bucket_name={}".format(bucket_name))
            raise

    # Check if bucket exists
    check_bucket(IN_BUCKET_NAME)
    check_bucket(OUT_BUCKET_NAME)

    # Create a pipeline
    response = transcoder.create_pipeline(
        Name=PIPELINE_NAME,
        InputBucket=IN_BUCKET_NAME,
        OutputBucket=OUT_BUCKET_NAME,
        Role=role.arn,
    )
    print("response={}".format(response))
    pipeline_id = response['Pipeline']['Id']

    # Create a job
    job = transcoder.create_job(
        PipelineId=pipeline_id,
        Input={
            'Key': INPUT_KEY,
            'FrameRate': 'auto',
            'Resolution': 'auto',
            'AspectRatio': 'auto',
            'Interlaced': 'auto',
            'Container': 'auto',
        },
        Outputs=[
            {
                'Key': 'HLS/1M/{}'.format('.'.join(INPUT_KEY.split('.')[:-1])),
                'PresetId': '1351620000001-200030',  # System preset: HLS 1M
                'SegmentDuration': '10',
            },
        ],
    )
    print("start time={}".format(datetime.now().strftime("%H:%M:%S.%f")[:-3]))
    print("job={}".format(job))
    job_id = job['Job']['Id']

    # Wait the job completed
    waiter = transcoder.get_waiter('job_complete')
    waiter.wait(Id=job_id)
    print("end time={}".format(datetime.now().strftime("%H:%M:%S.%f")[:-3]))


if __name__ == '__main__':
    main()
boto3-sample/elastic_transcoder.py at master · akiyoko/boto3-sample · GitHub
なお、Waiter を使って Job の完了を 30秒ごとに待ち受けていて、完了すると次へ進みます。120回チェック(60分)してもダメな場合は、エラーを返すようです。
class ElasticTranscoder.Waiter.JobComplete
- wait(**kwargs)
- Polls ElasticTranscoder.Client.read_job() every 30 seconds until a successful state is reached. An error is returned after 120 failed checks.
http://boto3.readthedocs.org/en/latest/reference/services/elastictranscoder.html#waiters
<実行結果>
$ python elastic_transcoder.py
response={u'Pipeline': {u'Status': u'Active', u'ContentConfig': {u'Bucket': u'boto3-transcoder-out', u'Permissions': []}, u'Name': u'HLS Transcoder', u'ThumbnailConfig': {u'Bucket': u'boto3-transcoder-out', u'Permissions': []}, u'Notifications': {u'Completed': u'', u'Warning': u'', u'Progressing': u'', u'Error': u''}, u'Role': u'arn:aws:iam::xxxxxxxxxxxx:role/Elastic_Transcoder_Default_Role', u'InputBucket': u'boto3-transcoder-in', u'OutputBucket': u'boto3-transcoder-out', u'Id': u'1446420696270-6garrw', u'Arn': u'arn:aws:elastictranscoder:ap-northeast-1:xxxxxxxxxxxx:pipeline/1446420696270-6garrw'}, 'ResponseMetadata': {'HTTPStatusCode': 201, 'RequestId': 'b175294d-80f0-11e5-8fdf-67ed42920387'}}
start time=08:31:36.770
job={u'Job': {u'Status': u'Submitted', u'Playlists': [], u'Outputs': [{u'Status': u'Submitted', u'PresetId': u'1351620000001-200030', u'Watermarks': [], u'SegmentDuration': u'10.0', u'Key': u'HLS/1M/D0002022073_00000/sample', u'Id': u'1'}], u'PipelineId': u'1446420696270-6garrw', u'Output': {u'Status': u'Submitted', u'PresetId': u'1351620000001-200030', u'Watermarks': [], u'SegmentDuration': u'10.0', u'Key': u'HLS/1M/D0002022073_00000/sample', u'Id': u'1'}, u'Timing': {u'SubmitTimeMillis': 1446420696699}, u'Input': {u'Container': u'auto', u'FrameRate': u'auto', u'Key': u'D0002022073_00000/sample.mp4', u'AspectRatio': u'auto', u'Resolution': u'auto', u'Interlaced': u'auto'}, u'Id': u'1446420696652-iqcw9u', u'Arn': u'arn:aws:elastictranscoder:ap-northeast-1:xxxxxxxxxxxx:job/1446420696652-iqcw9u'}, 'ResponseMetadata': {'HTTPStatusCode': 201, 'RequestId': 'b1b00f92-80f0-11e5-8c93-9d0b85e88cf1'}}
end time=08:32:06.922
(ただし、AWS Account ID は、「xxxxxxxxxxxx」と表記しています。)

なお、上記を実行する前に、
<過去記事>akiyoko.hatenablog.jp
で書いたように、AWS ユーザのアクセスキーを設定しておきます(認証に失敗すると、botocore.exceptions.NoCredentialsError が発生します)。
本来ならば、「Elastic_Transcoder_Default_Role」の IAM Role を設定した Elastic Transcoder 実行用のユーザを用意して、そのユーザのアクセスキーを発行して使うのがよいのでしょうが、簡便のために(Elastic Transcoder 実行用のユーザを作らずに)、何でもできる管理者「Admin」ユーザのアクセスキーを使用しています。
$ aws configure
AWS Access Key ID [None]: AKIXXXXXXXXXXXXXXXXX
AWS Secret Access Key [None]: xxxxxxxxxxxxxxxxxxxxxxxxxxxxxxxxxxxxxxxx
Default region name [None]: ap-northeast-1
Default output format [None]: json
6. Static Website Hosting を設定する
出力バケット (boto3-transcoder-out) の Static Website Hosting の設定をして、HTML5 の videoタグから参照できるようにしておきます。

7. ブラウザ(Safari)で動作確認
index.html
<!DOCTYPE html>
<html lang="ja">
<head>
<meta charset="utf-8">
<title>Video Test | akiyoko blog</title>
</head>
<html>
<body>
  <video width="480" height="270" preload="none" controls src="HLS/1M/D0002022073_00000/sample.m3u8">
  </video>
</body>
</html>
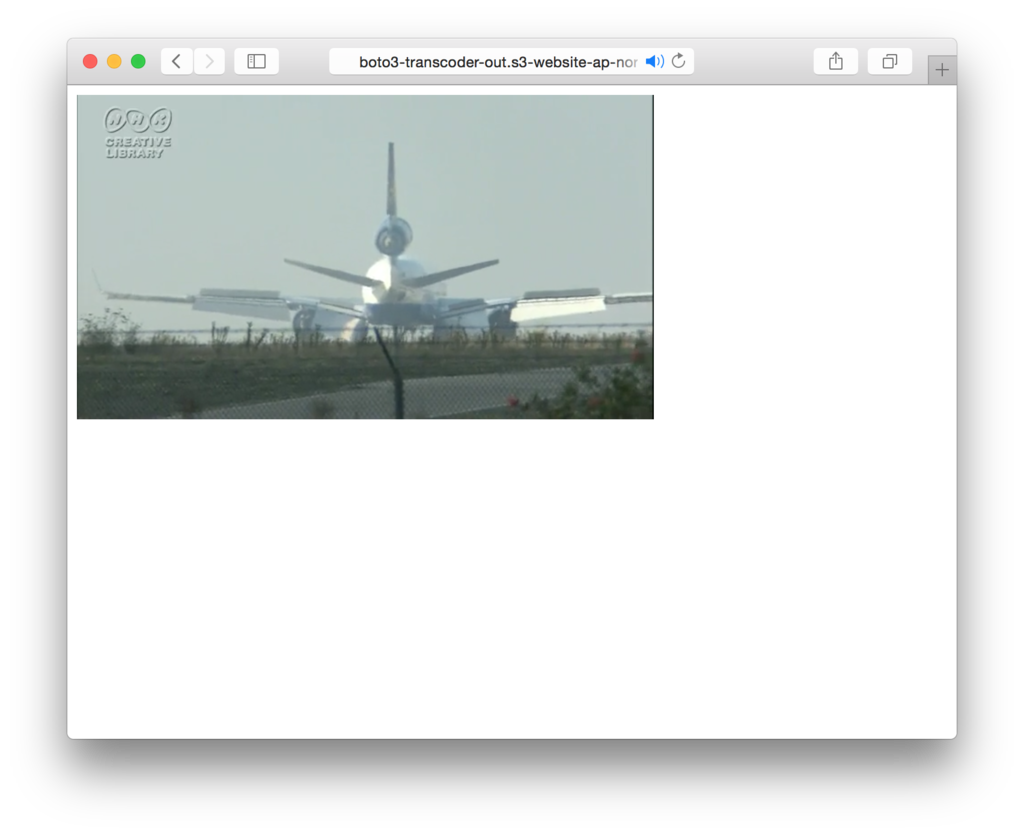
Safari を起動して、出力バケット (boto3-transcoder-out) のエンドポイントにアクセス。

きちんと再生することができました。
まとめ
Boto3 で Amazon Elastic Transcoder を操作して mp4動画ファイルを HLS形式にトランスコードするための Pythonコードを試してみました。
次のステップとして、S3 に mp4ファイルがアップロードされたら、Lambdaでそれを検知して、HLS形式の動画を出力バケットに吐き出すといった仕組みを作ることができます。
Lambda では(デフォルトのままでは)Boto は使えないので、今後は、Boto3 に慣れていく必要があるかと思います。